Skull STL Files for Implant Design and Surgery Training

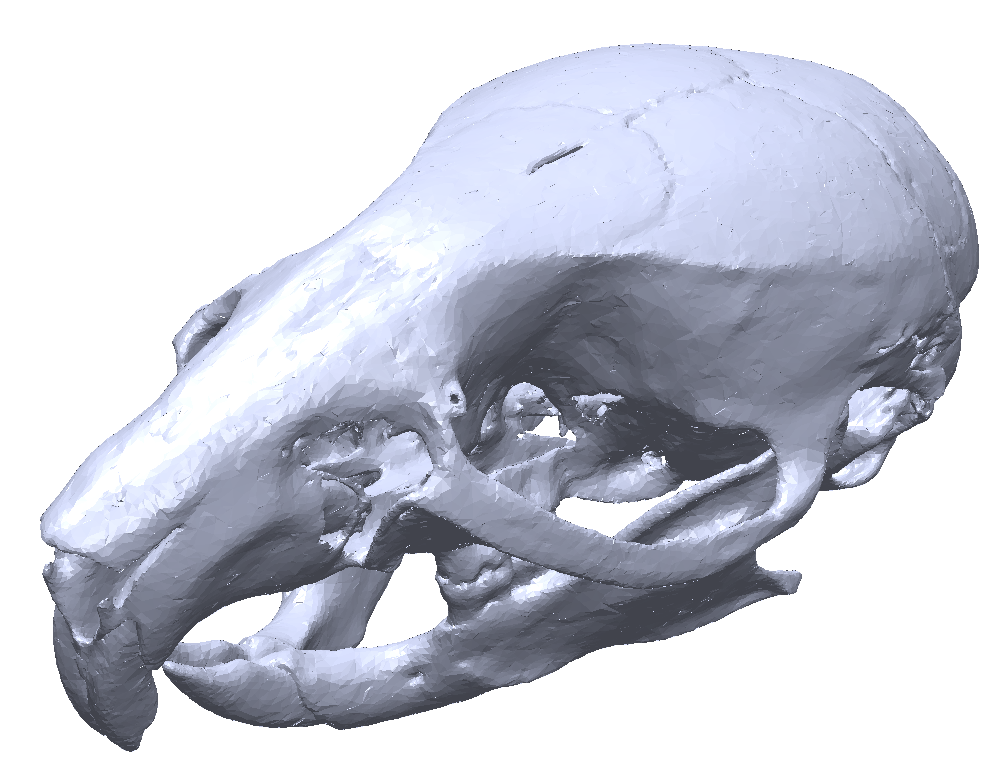
The following 3D animal skull models can be used for CAD design of skull mounted parts, using CAD to plan surgical implants, or creating 3D-printed models for practicing animal neurosurgeries. This resource stems from 3D printed rodent skin-skull-brain model: A novel animal-free approach for neurosurgical training along with the incredible set of scans from the digimorph project. Others have contributed additional models on top of these resources. See the bottom of the page for credits. Please reach out if you would also like to contribute!
STL Downloads:
Producing Models to Practice Animal Neurosurgery:
Description:
3D prints of these models can be made rapidly and at low cost providing cost- and time-efficient, animal-free neurosurgery training. They can serve as more-humane replacements for practicing stereotaxic surgery techniques including but not limited to craniotomies, screw placement, brain injections, implantations and cement applications. The goal of providing these resources is to provide an easy step for labs to implement the replacement, reduction, and refinement (3Rs) principles of animal experimentation.
Materials and Printing Methods:
Skulls: The following 3D printing specs have been tested and verified for the purpose of fabricating surgical practice models with adequate landmark visibility and haptic feedback based upon the experience of highly-trained animal surgeons:
Printer: Formlabs Form3 LFS printer
Material: Tough 2000 resin
Resolution: 0.05mm layer thickness for mouse and 0.1270mm for rats, support needed
Wash: Form Wash, Isopropyl alcohol for 10 minutes
Curing: Form Cure, 60 minutes at 70°C
Both models can also be printed with more standard materials such as PC-ABS or PLA, but the render and haptic feedback may be less realistic. It is possible that other 3D printers provide similar quality surgery practice models. If you would like to suggest another printing method that worked well for you, get in touch.
Brain addition: Polyurethane expanding foam (PU 500 from Fischer, or similar) projected from the foramen magnum, let dry, remove excess with forceps.

(A) Brain model once dry. (B) Excess of PU foam removed.
Skin addition: 1mm thick clear silicone sheet (Polymax, UK) is secured on the skull using silicon glue (Dowsil™ 732, Dow, USA) under both temporal crests, on the lower end of the interparietal bone and on the very front of frontal bone to keep the skull clean of glue over bregma and lambda landmarks. Skin addition process is long so we recommend adding this only when you need to practice on suturing. We are currently working on an alternative with an easier process.

(A) Zones where glue should be applied. (B) Clamping during the setting time.
Credits:
Thanks to those who published the original STL files:
Digimorph.org: Incredible set of 3D scan all different types of animals, alive and extinct.
Pohl BM, Gasca F, Christ O, Hofmann UG. 3D.stl file of rat skull. 2013 [cited 2020 Nov 12]. Dataset: figshare [Internet]. https://figshare.com/articles/3d_stl_file_of_rat_skull/777745
Rowe T, Demarest M. "Mus musculus". 2001 [cited 2020 Nov 12]. Dataset: Digital Morphology [Internet]. http://digimorph.org/specimens/Mus_musculus/
Thanks to Marie Bainier for bringing this protocol to our attention and permitting us to share here. Thanks to Marie Banier, Arel Su, Roger Redondo, and the acknowledged for playing a role in developing and publishing their protocol to save cost, animal lives, and time as well as promote 3D printing to solve everyday bottlenecks. For more information, please refer to their paper: 3D printed rodent skin-skull-brain model: A novel animal-free approach for neurosurgical training.